

If you’re an ACA insurance agent, chances are you’ve heard of HealthSherpa. It’s a powerful platform designed to make enrolling clients in Marketplace plans faster, more efficient, and straightforward.
But if you’re new to it or want to confirm that you’re using it to its full potential, this article will explain everything you need to know.
Step 1: Sign Up or Log In
First, you’ll need to sign up if you don’t have a HealthSherpa agent account.
- Head to HealthSherpa and login
- Click on blue “Sign Up Now” button
- Follow the prompts to create an account
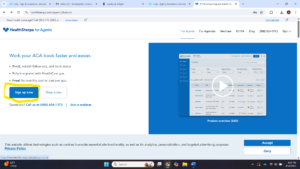
- Already have one – login. Easy peasy!
Keep your NPN (National Producer Number) handy. You’ll need it to set up properly.
Step 2: Get Your Settings in Order
Take a moment to set up your preferences.
- Update your profile
- Add your agency (if applicable)
- Double-check your commissions set up to confirm you receive credit for enrollments
Customize your HealthSherpa link to share with clients. This allows them to explore plans, input info, and even enroll while keeping you the agent of record.
Step 3: Start a New Application
Once you’re set-up, it’s time to start enrolling clients.
- From your dashboard, click “New Application”
- Enter your client’s details. HealthSherpa streamlines the process, but here are a few things to keep in mind:
-
- Income accuracy matters – Use the income estimator tool if needed
-
- Household info is key – Make sure dependents, tax filing status, and residency details are correct
-
- Special Enrollment Periods (SEPs) – If your client is outside Open Enrollment, ensure they qualify for an SEP.
Step 4: Compare Plans & Make Recommendations
HealthSherpa gives you side-by-side plan comparisons so you can break things down for your clients in plain English.
- Look at monthly premiums, deductibles, co-pays, and network coverage to find the best fit for your client
- Use the “Estimated Yearly Costs” feature to get a real sense of your client’s pay over the year, not just the monthly premium.
Step 5: Submit the Enrollment
- Once your client picks a plan, confirm all details
- Sign electronically
- Submit, and you’ll receive a confirmation number. Your client will receive the next steps. It’s that simple.
Step 6: Follow Up & Stay in Touch
After enrollment, don’t disappear! Send a quick follow-up email or text to confirm your clients receive their policy details.
This is a great time to remind them about payment deadlines, what to expect from their new plan, and how to reach you if they have questions.
Why Agents Love HealthSherpa
HealthSherpa isn’t just about enrollments; it’s about enabling client partnerships and making your life easier.
Built-in tools for tracking clients and processing renewals simplifies the Marketplace ACA process. If you haven’t fully explored them yet, now’s the time to do so for more streamlined ACA enrollments and commissions.
HealthSherpa is a great Agility partner. Visit our events page now to register for the latest ACA training you can access.
Agility ACA training includes sessions specific to HealthSherpa, so contact Agility at (866) 590-9771 or email support@enrollinsurance.com to find when the next HealthSherpa training opportunity will be. You can also visit our ACA contracting website to see our ACA partners.
Agility can also add you to our weekly free email list for more tips and other vital information for insurance professionals to know delivered to your inbox!